STYLE
Fashion
Make the best keepsake just by cleaning your closet

If you're like us, you're attempting to start the year on a clean slate. One plague that holds us all back? Piles and piles of t-shirts that remind us of the amazing places we've been...but that we don't exactly wear on the regular. Presenting a cozy solution to your clutter problem: a DIY quilt that keeps all your memories in one place. Here's exactly how to make one at home, even if you aren't super crafty.
What you need:
- Clean T-shirts (hint: 9 or 16 is perfect)
- Scissors
- A 12" x 12" piece of cardboard
- Tailors chalk (find it at a craft store)
- 1.5 yards of fleece (find it at a craft store)
- Sewing machine (optional)*
How to do it:
Step 1:
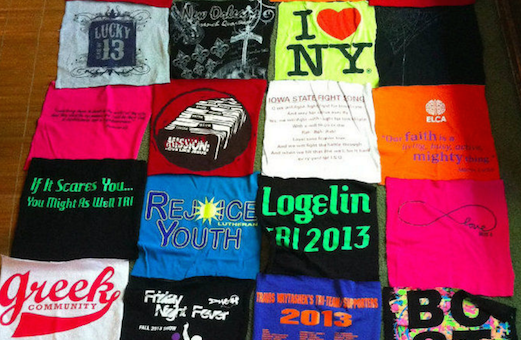
Lay the first T-shirt flat and place the cardboard piece over the logo. Trace the cardboard with the tailors chalk. Remove the cardboard piece and cut along the lines (remember: it's important to use sharp scissors!). Repeat this step for all of the other T-shirts.
Step 2:

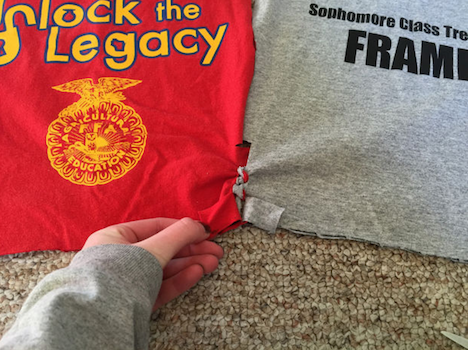
Take two of the cut T-shirts and lay then on top of each other with the designs touching each other, making sure they are lined up. Cut small strips on the sides of both T-shirts. Tie the strips together but leave the top and bottom pair of the strips untied. Unfold the panels and place the next t-shirt panel, onto the panel on the right side. Repeat the steps from before and continue the process. Tie the shirts by row (if you used 9 shirts, you'll have three rows; if you used 16 shirts, you'll have 4 rows).
Step 3:

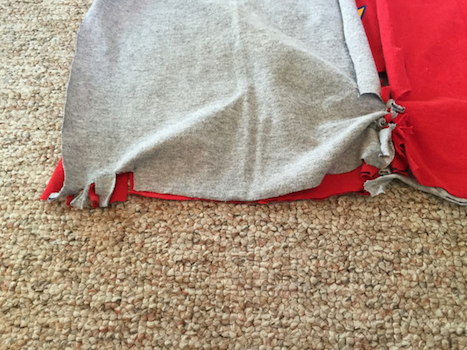
Cut the tops and bottoms of the t-shirts on the rows and tie the rows together. Cross the ties so that the corners are tied together. At the end of this step, all of the shirts should be tied together, but none of the perimeter should be cut.
Step 4:

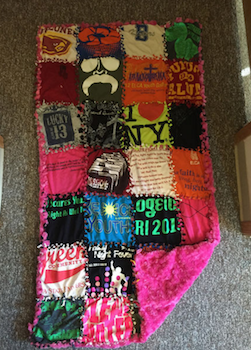
Lay the plush material out on a flat surface. Cut small strips on the perimeter of the t-shirts and the plush material. Tie the two pieces of material together, and you're done.
Step 5:
Get into your comfiest pajamas and go cuddle with your new blanket!
*Got a sewing machine? You'll sew the pieces together, instead of cutting and tying them. (Full how-to here).
Source and picture credit: instructables.com
POSTED IN Fashion

 become a contributor


