become a contributor


MAKE IT CUTE
Parties
The best DIY decorations to have at your grad party

 VIEW THUMBNAILS


-

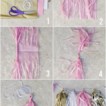
Tassel garland
Materials:
- String
- Scissors
- 4 colors of tissue paper (1 piece of tissue paper makes one tassel)
Directions:
1. To begin, fold your tissue paper in half and then in half again, making a square. Start cutting strips towards the fold to create the fringe, leaving about 1 inch uncut from the fold line.
2. After all your strips are cut, unfold your tissue paper (careful not to rip it!), and begin tightly rolling your tissue paper down the middle.
3. Continue rolling down the middle, untangling your fridge as needed.
4. Fold in half and then twist creating the loop for hanging.
5. Repeat to create more tassels in various colors. Hang from string (or ribbon) and fall in love with your new DIY mantle decor!
Photo & DIY courtesy of: snhblog.com -

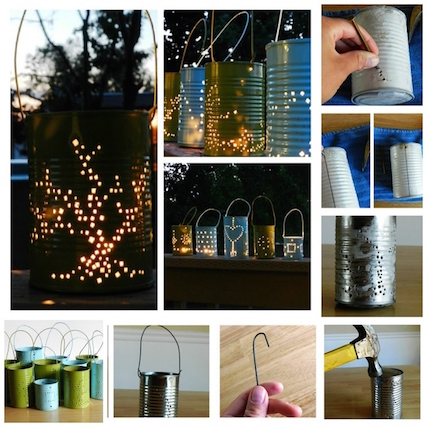
Tin can lanterns
Materials:
- Recycled tin cans
- Hammer
- Nail
- Bailing wire
- Pliers
- Spray paint
- Tea light candle
Directions:
1. Remove labels and glue from the cans.
2. Fill cans with water and stick them in the freezer. Leave them in until the ice is solid. This helps the can hold its shape for the next steps.
3. Take your frozen can out of the freezer. Using a hammer and nail, pound a hole near the top of the can. Flip the can over and make another hole straight across from the first hole. These will be used for the handle later on.
4. Make your design. Use the hammer and nail to start punching out a design in your can. You can draw it our before hand or wing it.
5. Once your design is all finished, let the ice melt out of the can and dry it out.
6. Upon turning the can over, you'll notice a big bulge in the bottom. This comes from freezing water in it. But, it can be fixed! Just pound it down with a hammer so that it sits flat.
7. Time to make a handle. Cut a 12-inch strip of bailing wire and curve the end of it to form a hook. Stick the hook through one of the topside holes.
8. Twist the hook around to secure it. Make a hook on the other end of the wire. Stick it in the side hole on the other side and twist it around.
9. Paint several coats on to cover the entire outside of the can and handle.
10. Once the paint is dry, insert tea light candles and light them up!
Photo & DIY courtesy of: growcreative.blogspot.com
-

Confetti balloons
Meterials:
- Balloons
- Gold Foil Confetti
- Decoupage Glue or Mod Podge
- Paint Brush or Foam Brush
*If you are filling your balloons with helium, so they float, you’ll need to make sure you do not add too much confetti to the balloons or they won’t be able to stay up! It’s best to sacrifice one balloon as a tester so you can see how much confetti it can handle. If you’re just filling these guys with air and letting them bounce around on the floor, then the more confetti the better.
Directions:
1. Inflate a few balloons, tie them and paint glue to the bottom of each one.
2. Once you have your glue on there, over a large bowl or sing, go ahead and start dipping and sprinkling confetti on.
3. Shake the balloon so all the excess confetti falls off, then let it dry for 30 minutes.
Note: The confetti stays on pretty well with just those steps, but for extra security you can also add another layer of the decoupage glue overtop of your confetti and let it dry (it will dry clear.) If you do this, make sure you factor the extra bit of wait from that second layer in so you don’t end up weighing down your balloons!
Photo and DIY courtesy of:: studiodiy.com


POSTED IN fun stuff, diy, room decor, diy gifts


LOVE THIS
We're setting you up on a Book Blind Date 💜

Is it possible to crush on a book? Most def. Click HERE to check out (and enter to win!) our fave new titles and you might just find yourself swooning...
FREE STUFF
Win! I Am, I Can, I Will

Consider this book the starter kit for becoming your best self. Packed with inspiring quotes, gorg illustrations, thoughtful writing prompts and mini bios of accomplished Black women throughout history, it takes every reader on an empowering journey. Enter to win here!