MAKE IT CUTE
Fashion
How to make your own trendy kimono in a snap

With trendy prints and sleeker cuts, the kimono has been given fresh life outside festival grounds. It's back in a big way this season and will be your go-to cover up for any beach day or casual spring night out with your BFFs. This bohemian staple easily adds a light, extra layer but, more importantly, it jazzes up every spring weather frock.
From traditional, bright long pieces to short jacket versions, here's how to make your own instead of splurging and buying one at the store. Plus, it's totally simple to make and ya don't even need a sewing machine.

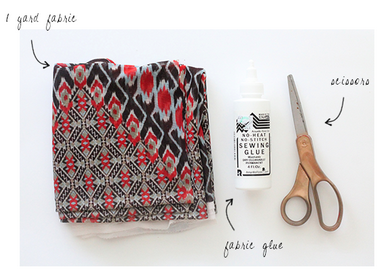
What you'll need:
- 1 square yard of fabric (stretchy sheer works best)
- Fabric scissors
- Fabric glue
- Sewing needle
- Thread that matches your chosen print
Directions:
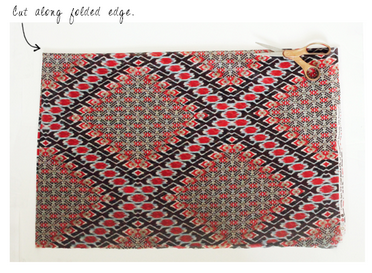
1. Fold your fabric in half, lining up the edges. Then fold it in half again, in the opposite direction, so that it is in fourths. We suggest using a stretchy nylon sheer so it can be left raw. If you use any other type of fabric, use your liquid stitch to create a 1/4-inch hem.
2. Cut along the folded edge of the top layer only. This will create the slit evenly in the middle of your garment.

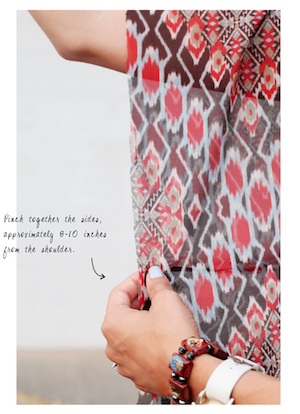
3. Place around your shoulders and make sure everything measures the way you like. Pinch together the sides and hand stitch going under and over (or fabric glue your arm hole if ya don't want to sew), approx. 8-10 inches from the shoulder.

4. Tada! There you have it. A stylish kimono that stands out from the rest.

Photos and diy courtesy of: andreasnotebook.com & verilymag.com
Have you ever made your own clothing? Share in the comments below.

 become a contributor


