The camera turns to you as you sit against the blue screen in
the school cafeteria. It seems to zoom in on your baggy eyes or that pimple
sitting on top of your nose. Oh, picture day.
Don’t worry, babe, we’ve been there. No need to cake on the makeup—we’ve got
beauty tips to make ya feel comfy in the skin you’re in while looking
picture-perfect.
Step 1.
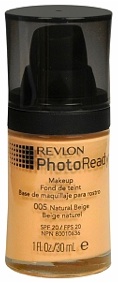
Start with a foundation that’s made to look great on camera.
BB creams are wonderful for everyday, but the high SPF in most BB creams can
cause it to reflect back in camera flash, making you looked washed-out and way
too pale in pictures. Try applying a thin layer of Revlon’s PhotoReady Makeup
with a stippling brush and build it up as needed.
Revlon PhotoReady Makeup, $14, drugstore.com
Step 2.
Use a highlighting concealer that can banish those under eye
circles in a flash. We recommend an old favorite of ours: Maybelline’s Dream
Lumi Touch Highlighting Concealer. Pat and blend around your eyes, on the
bridge of your nose and even on troublesome acne scars. This will make your
face glow from within!
Maybelline Dream Lumi Touch Highlighting Concealer, $8,
walgreens.com
Step 3.
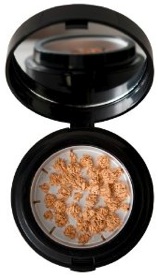
Feeling sweaty and oily? Before you step in front of that
camera, dust a little bit of powder onto shiny spots. Only a little bit though:
A little goes a loooooong way. Try NYX’s High Definition Powder. It’s made for
HD, and it’ll have you looking camera-ready in a flash.
NYX Cosmetics High Definition Photogenic Grinding Powder,
$25, ulta.com
Step 4.
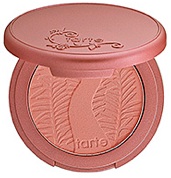
Let’s bring some life back into those cheeks! Apply a tiny
bit of a mauve-y blush onto the apples of your cheeks and up to your temples
with an angled blush brush. Create a subtle triangle with your blush (that is,
more blush on the apples of your cheeks and less blush as your reach your
temples). This triangle will make your face look slimmer without anyone
noticing that you did it with makeup. How do you find the “apples of your
cheeks”? Give your mirror a nice, big grin and you should see two cute “apples”
on those cheeks. Check out Tarte’s Amazonian Clay 12-Hour Blush in Exposed. The
high price point is definitely worth it!
Tarte Amazonian Clay 12-Hour Blush in Exposed, $25,
sephora.com
Step 5.
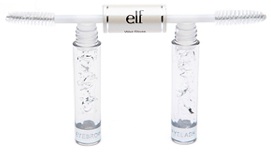
Eyebrows are the picture frames to your eyes. Take a clear
brow gel (like e.l.f.’s Wet Gloss Lash and Clear Brow Mascara) and groom
through your brows to keep ‘em in place.
Step 6.
We love color, but natural eyes are the way to go for
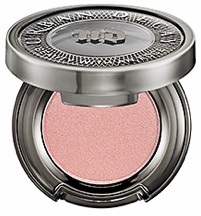
pictures that will last a lifetime. Sweep on Urban Decay’s eyeshadow in Sin.
This is a beautiful champagne color that is always in style.
Urban Decay Eyeshadow in Sin, $18, sephora.com
Step 7.
Take black or brown eyeliner and line your lashline. For a
more dramatic look, smudge out the eyeliner a little bit to create a subtle
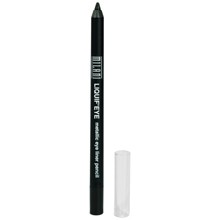
smoky. We recommend Milani’s Liquif’eye Metallic Eye Liner Pencil in black
because this stays put through sweat and tears! Even though it stays on, make
sure to check in a mirror and use a Q-tip to clean out any smudges before
sitting in front of the cameraman. Then, finish with a sweep of mascara.
Milani Liquif’Eye Metallic Eyeliner Pencil in Black, $7, cherryculture.com
Step 8.
Choose a “my-lips-but-better” sort of shade for your lips. We
are love, love, loving Revlon’s new Just Bitten Kissable Balm Stain in Honey.
This lippie glides on easily like your favorite balm but delivers a punch of
beautiful, kissable color. And, of course, it leaves a rosy stain behind even
after you eat.
Revlon Just Bitten Kissable Balm Stain in Honey, $9,
drugstore.com
Step in front of that camera and give it your best smile.
Trust us, confidence is the biggest beauty secret. Good luck girls!




 become a contributor


