MAKE IT CUTE
DIYs
Witch Crafts: DIY your way to a wickedly cute Halloween
-
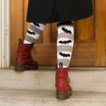
Bat Socks
You’ll love these creepy-yet-cheeky socks right off the, uh, bat.
Materials
• Knee-high socks
• 13 x 6-inch piece of cardboard
• Bat template
• Felt scraps
• Temporary adhesive spray
• Sewing kit
• Perle cotton floss that matches felt
How to make it:
1. Stretch one sock over cardboard so fabric lies flat.
2. Using bat template, cut out six bats from felt.
3. Use the spray adhesive to temporarily attach three bats to the back of the sock.
4. Whipstitch the top bat to the sock using the cotton floss, sewing around edge of the fabric. Add a few extra stitches to the head to give the bat ears.
5. Slip the sock off the cardboard and sew the remaining bats to the sock. (Don’t forget to stitch on those ears!)
6. Repeat steps 1 through 5 for the second sock.
Don't forget to get the template HERE!
-
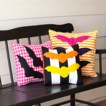
Batty Pillows
Stylish stuffed spookies to get you in the spirit.
Materials:
• 3/4 yard of cotton fabric
• Bat template
• 1/4 yard of felt in various colors
• Sewing kit
• 16-inch square pillow form
• Sewing thread to match felt
How to make it:
1. Cut one 16-inch square front pillow piece and two 16- x 10-inch back pillow pieces from the cotton fabric.
2. Using template, cut three bats from various felt colors.
3. Center three bats on pillow front and pin them in place. Sew bats to pillow using coordinating thread and a straight stitch about half a centimeter from the edge of the bat. Set pillow front aside.
4. The two back pieces will overlap each other, creating an opening for the pillow form. First, hem one of the long 16-inch sides on each piece. Start by folding a 1/2 inch under and ironing it, then folding another 1/2 inch under and ironing again so fabric’s raw edge is completely covered. Sew a straight stitch along this side to secure it, about a 1/4 inch from the fabric edge. Repeat on the second piece.
5. To put pillow together, lay front piece with the right side facing up on a table. Lay one of the back pieces on top of it, with the right side of fabric facing down and with the finished edge in the middle of the pillow. Line up the other edges.
6. Now lay the other back piece on top of that, with the right side facing down and the finished edge in the middle of the pillow. Pin the three layers together, all the way around the perimeter of the pillow.
7. Sew around pillow about 1 centimeter from the edges.
8. Trim the corners of the pillow carefully, then turn the pillow right side out. Insert your pillow form.
Don't forget to get the template HERE!
-
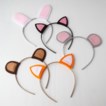
Ears-to-You Headbands
Terrific toppers turn every ensemble into a charming costume. We dare ya to pick just one.
Materials
• Headband templates
• Stiff felt for outer ears, up to 6 1/2 x 7 1/2 inches
• Felt for inner ears, up to 3 x 3 1/2 inches
• Matching sewing threads
• Plastic headband
• Craft glue
How to make it:
1. Use templates as a guide to cut out two outer ear shapes and two inner ear shapes.
2. Position one of the inner ear shapes on one of the outer ear shapes. Pin into place and secure with whipstitches around edge of the fabric. Repeat with the second ear.
3. Fold one of the ears around the headband (right sides out) so that the top edges of the ear line up, then pin the ear pieces together at the top. Make sure it’s in the position you want (slightly off-center), then add a drop of craft glue to the underside of the headband and pull the felt around it tightly, holding in place for about a minute to allow the glue to set.
4. Secure it using the matching thread, sewing straight across the ear, following the line of the headband. Remove the pin in the top of the ear.
5. Whipstitch around the edge of the ear, sewing the sides together with matching thread.
6. Repeat steps 3 through 5 with the second ear.
Don't forget to get the template HERE!
-
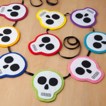
Rainbow Skull Garland
Eerie, colorful skulls give your H’ween décor a cool, Dia de los Muertos vibe.
Materials:
• Sewing kit
• Skull template
• 2 sheets of white felt, 9 x 12 inches each
• Black felt, 6 x 8 1/2 inches
• 9 bright pieces of felt, 5 1/2 x 9 1/2 inches each and matching sewing threads
• Black embroidery floss
• Black ribbon, about 5/8 inch wide and 8 feet long
How to make it:
1. Use templates to cut out the following felt pieces for each skull: one white skull, two black eyes, one black nose and two bright backing shapes in the same color.
2. Pin a white skull in the center of one of the bright backing shapes. Use white thread to sew around the edge of the skull, and then remove the pins.
3. Pin eyes and nose in position (as pictured), and use black thread to sew them into place. Remove pins.
4. Use black embroidery floss to sew the skull’s mouth.
5. Repeat steps 2 through 4 for all the skulls in garland.
6. Lay out the remaining backing shapes (remember, there are two for each white skull) on your work surface in equal increments. Place the black ribbon over top about an inch from the top of the backing shape, keeping some spare ribbon at the end to hang the garland. Pin the ribbon to each backing shape, and sew them together.
7. Place the front backing shape with the skull already sewn to it on top of its corresponding backing shape, pin in place, and use a whipstitch around the edge of the fabric to sew them together. The ribbon should be sandwiched in the middle of the two pieces of felt. Remove the pins—and hang!
Don't forget to get the template HERE!

 become a contributor


 VIEW THUMBNAILS


