become a contributor


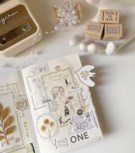
MAKE IT CUTE
DIYs
5 DIY textbook covers you've never thought of

Map It Out
Chances are your ‘rents have a pile of old road maps they don’t use anymore. See if they’re willing to donate ‘em to your DIY grab bag, and repurpose into seriously awesome textbook covers.
Happy Birthday to You
You might not want your textbook wishing you a ‘Happy Birthday’ every time you pull it out, but there’s lots of wrapping paper that looks festive without being stuck to one particular holiday. So see if you have any lying around that house that’s simple but pretty, and slap it on a book.
All Summer Long
Make the summer last by preserving your pics on your textbooks. You can use a brown paper bag as a base and then glue your pics onto that. Then every time you get out a book, you’ll be reminded of the great memories you made this year.
Ghostly Covers
If your mom has some old bed sheets lying around, see if you can cut ‘em up to use for your textbooks. Obviously, you don’t wanna use a plain white sheet, but maybe there are some from when you were little that have cool designs or pretty colors on ‘em.
Funnies, Anyone?
Grab last week’s newspaper, and skip right to the comics. Slap those pages on your books, and you’ll be smilin’ all year long. Cover with clear packing tape to avoid making your hands smudgy 24/7.
How to Create Your Cover:
Lay your textbook out flat and open on top of whatever cover material you’ve decided on. Measure the vertical side of the book, and add 5 inches to that. Then measure the horizontal side, and add 6 inches to it. Cut a rectangle out of the cover material with those dimensions. Then with the book open and flat on the rectangle, cut a slit from each corner of the material in to the corresponding corner of the book. Finally, cut out a small rectangle in the middle of the material at the top and bottom of the book, where the binding is. Then fold the flaps of material in, overlapping wherever necessary, and tape them in place. Make sure to leave them a li’l loose, so there’s room for the book to slide when it’s opened and closed.
SCHOOL HOUSE ROCK | Your best year yet
+ Crafty locker upgrades you can DIY
+ Yum-o-licious! Tasty after-school snacks
+ Can’t wait for the weekend? Start planning now
WIN IT | Score serious BTS swag before ya hit the halls
GET CONNECTED | Want more from GL? Get it on the daily on Facebook, Twitter, Pinterest and Tumblr.
POSTED IN back to school, crafts, diy


POLL
At the school career fair, who are you approaching first?

LOVE THIS
🌸 QUIZ! Plan your perfect spring picnic 🌸

The flowers? Blooming. Your al fresco hangout? Totally ready to get plotted (inspired by our current read, The Second Favorite Daughter's Club: Sister Sabotage). Click HERE to take the quiz!
FREE STUFF
WELCOME TO THE WORLD OF WILDERLORE
Barclay Thorne and his fellow apprentices race against time to find a mythical beast. The adventurers’ strength is put to the test—especially since their mission involves crossing the treacherous Tundra, where countless dangers await. Enter to win here!