become a contributor


MAKE IT CUTE
DIYs
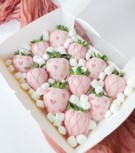
Make your own Insta-worthy jewelry dish in no time

We all have tons or jewelry just laying around our room. This marbled jewelry dish is the perfect solution for keeping all of your adorbs accessories in one place. You'll never lose your fave ring again...and you have a cute new addition to your room! Try it out here:
What you’ll need:
+ White, black, and colored oven bake clay
+ X-Acto knife
+ Small bowl that is oven safe!
+ Gold paint and a small paintbrush
+ Rolling pin or large round jar
+ Large can or jar to trace around
+ Glaze to seal dish (optional)

How to make it:
1. Roll each color of clay that you want to use into a snake about 5″ long. You want enough total clay to roll out a 6″ circle
2. Combine the smaller rolls into one big roll and twist together.
3. Roll the large twist into a snake about twice the original length to combine the colors. Twist the ends opposite ways after every few motions to give the colors more of a candy cane look. Once it’s twice the length, fold the snake in half and twist the two ends together. Repeat the rolling, folding, twisting and rolling again process 2-3 times.
4. Smoosh all the clay into a ball.
5. Use a rolling pin or glass jar to roll out your marbled ball. The colors should blend together and create a marbled pattern as you roll over it. Try rolling different directions, from the edge, from the center, etc. to push the clay from different angles. Roll to 1/4″ thick.
6. Use a round item about 6″ wide as a template and cut out your dish circle with an X-Acto knife.
7. Place your circle gently into an oven-safe bowl that is a little smaller than your circle so it will sag a little in the center and give you more of a dish shape. Bake the bowl according to the temperature on the clay package. Remove the bowl from the oven and allow the clay to cool before turning the larger bowl upside down and tapping lightly until the clay dish falls out.
8. Once the clay is completely cool, use a small brush to paint the rim of the dish and allow the paint to dry.
9. Seal the dish with a glaze if you desire. The glaze won’t make the item food safe or totally waterproof, but it will give you a glossy finish if that’s what you’re into.
What colors are you going to make your dish? Let us know in the comments!
Photo + tutorial credit: A Beautiful Mess
POSTED IN MAKE IT CUTE, DIYs


POLL
This is NOT a drill: <em>Tortured Poets Department</em> is out! The first track you fell in love with was...

LOVE THIS
Say hello to our 2024 Beauty Awards Winners 💄

We’re presenting our beauty MVPs of this year so your face card... and hair card...and mani card...never, ever declines again. Check out our must-haves HERE!
FREE STUFF
Win! Silk'n hair straightener
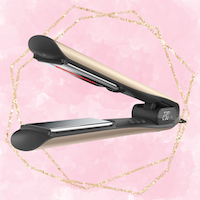
It's about to be the sleekest, shiniest spring yet—for your tresses, ofc. The SilkyStraight iron from Silk'n eliminates frizz and uses infrared technology—so the plates heat up ultra-fast (we're talking 15 seconds flat!). No more waiting around for your perfect hair day. Enter to win here!